Configuring XTM Portal
Silverstripe CMS
XTM Portal has been developed using Silverstripe  . Silverstripe is an open-source Content Management System for creating and maintaining websites and web applications. It provides a web-based administration panel that allows the user to make modifications to selected parts of the website.
For further details check Silverstripe.
Note
You can change the look and feel of the XTM Portal user interface in the Settings > Custom theme tab. Alternatively, the XTM development team can adjust it for you once the cost estimation has been approved.
Pages tab
Silverstripe offers tools to present your brand and content on your website pages. You can decide which pages you want to publish, in which languages, as well as reorganize your website page structure by using the drag and drop option.
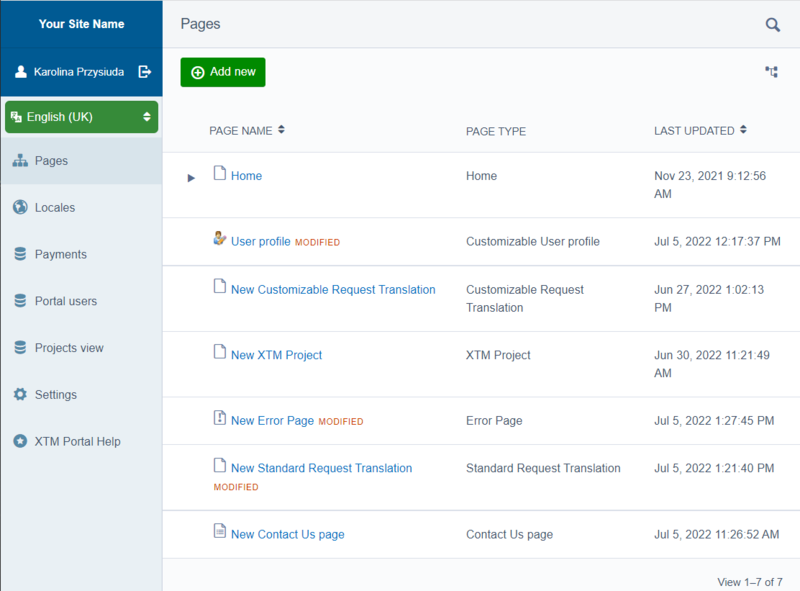
Pages: website page structure
The order of the pages in the XTM Portal navigation panel can be set by the XTM Portal Administrators. They can decide on the priority of the navigation menu items and hide less important items under the More tab.
Adding new pages
Pages can be created to appear in the main navigation bar (Top Level), or as subpages (Under another page).
In the Pages tab, select the Add new button to add new pages to your website.
Select a page type.
Select Create.
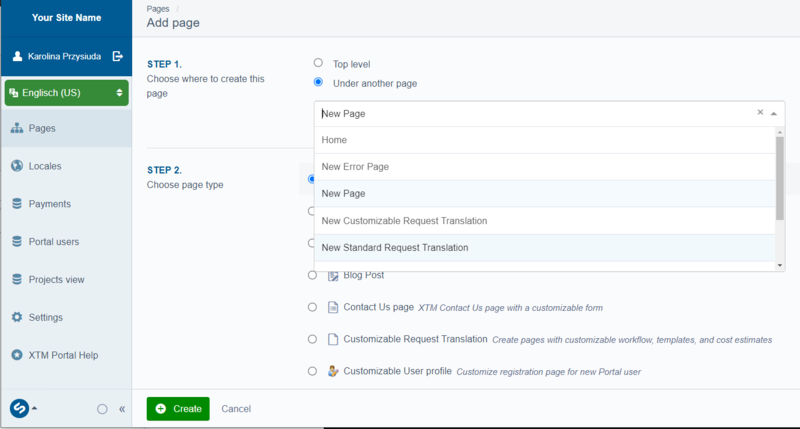
Adding a new page
Batch actions
The Batch actions function lets you perform multiple actions (restore, publish, unpublish, or archive) on several pages at one go.
Choose an action you want to perform, e.g. “Publish”, and select any number of pages you want to publish by selecting the checkboxes beside them. Click the Go button to complete the selected action.
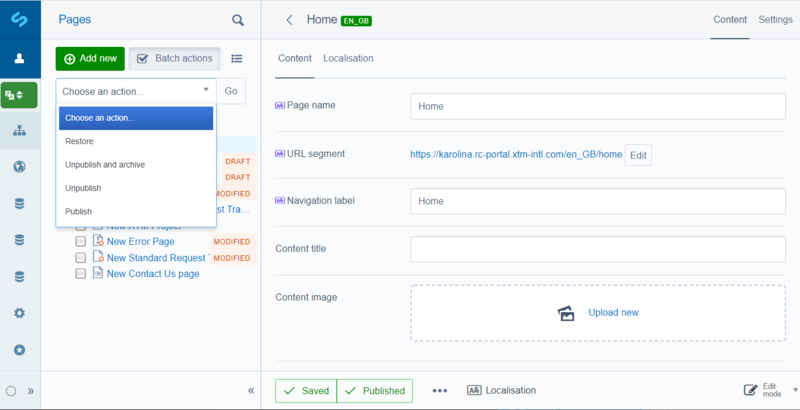
Applying batch actions
Setting a home page
You can set a different page than the home page as the main page. Under the Settings tab, you can choose to use this page as the homepage and insert the preferred website address into the Domain(s) field. Click Save. The link to the domain appears in the Settings tab of the homepage.
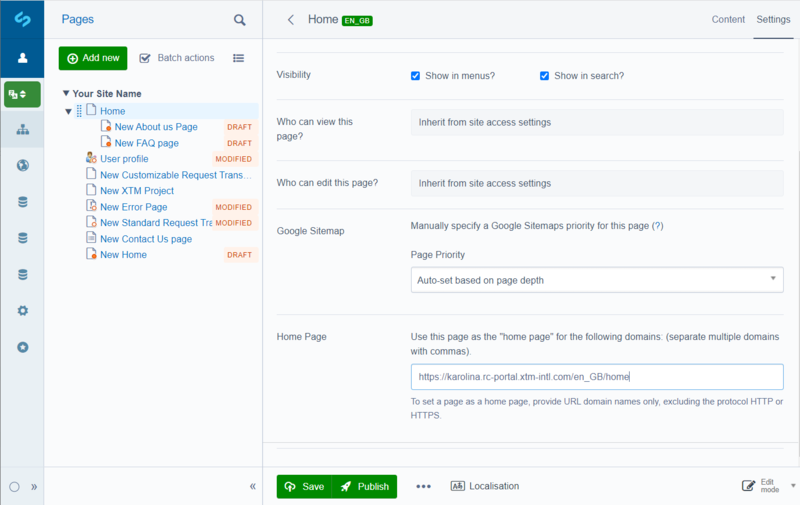
A home page with the assigned link
Hiding pages in XTM Portal
Go to the Pages tab.
Select a page.
Open the Settings tab in the top-right menu.
Go to Visibility, deselect Show in menus? checkbox.
Choose Save and Publish.
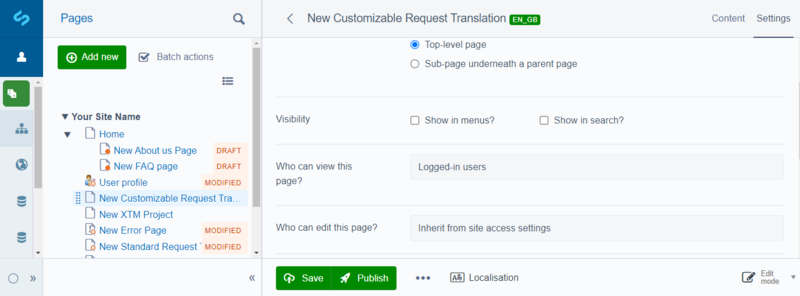
Hiding pages on the XTM Portal navigation bar
Hiding and displaying columns on the XTM Projects page
Under XTM Pages > Content > Columns, XTM Portal Administrators can configure the appearance of the XTM Project listing page by defining which columns can be visible to XTM Portal users and in what order they will appear. Such columns as ID, Name, and Status, by default, are always visible, but others can be hidden from view.
Customization of the Registration page
This feature is available for Customizable Request Translation.
XTM Portal has now a new Registration form page (called Customizable User Profile) where the Administrators can tailor the new user registration form to their needs.
Under Pages > User Profile > Content > Profile, XTM Portal Administrators can decide which fields will have to be filled out by the new users. These fields are by default mandatory:
First name
Last name
Username
Email
Password (for non-SSO users)
Time zone
Locale
Enabling download source files and reference materials
Go to Pages tab in your domain and select XTM Projects.
In the Content tab on the toolbar go to Additional settings and select:
Show download source files option in context menu checkbox to switch on downloading the source files feature in context menu – it is possible to download the most recent versions of all source files available for the respective project in XTM Cloud
Show download reference materials in context menu checkbox to switch on downloading the reference materials feature in context menu – it is possible if files have been uploaded either to XTM or XTM Portal
Click Save and then click Publish.
The project creator can now download source files and reference materials from XTM Portal UI.
Customizable Request Translation: Content
The Customizable Request Translation: Content - Additional settings enables XTM Portal Administrators to configure various functionalities.
The Content contains the following tabs:
Main Content
Localization
Files
Estimation
Custom fields
Customizable Request Translation: Content - Additional settings
This section provides information about mandatory and optional Additional settings parameters that you can use to define a translation order form for XTM Portal users requesting project translations in XTM Portal.
Parameter | Description | Mandatory/Optional | Type | Valid values |
|---|---|---|---|---|
Subject Matter | Select to show the Subject matter field in the translation order form to let users select subject matter of their project, or clear to hide it. | Optional | Checkbox | Valid values:
|
Deadline | Select to show the Due date field in the translation order form to let users set a deadline for their projects, or clear to hide it. | Mandatory (if selected) Optional (if cleared) | Checkbox | Valid values:
|
Project name | Select to show the Project name field in the translation order form to let users name projects to their liking, or clear to hide it. Determine if this field should be specified on the form by selecting the additional Obligatory checkbox. | Mandatory (if selected the Obligatory additional parameter) Optional (if cleared the Obligatory additional parameter) | Checkbox | Valid values:
|
Default workflow | Select to apply the Default workflow to set up projects in XTM Cloud (the Portal UI users cannot see the default workflow setting). | Mandatory (if selected) | Checkbox Dropdown | Disabled (cleared) by default Valid values as defined in XTM Cloud Workflow definitions (under Configuration > Settings > Workflow > Workflow definitions) |
Template | Select to show the Template field in the translation order form to let users set the XTM Cloud project template for their new project. | Mandatory (if selected) | Checkbox Dropdown | Enabled (selected) by default Valid values:
|
Apply XTM templates settings to XTM Portal projects | If the Template parameter details are selected, select to enable XTM Portal to apply templates to the translation order form, or clear to disable it. | Mandatory (if selected the Template parameter) Optional (if cleared the Template parameter) | Checkbox | Valid values:
|
Additional email address | Select to show an additional email address that users can specify to receive information about the project, or clear to hide it. | Optional | Checkbox | Valid values:
|
Reference materials | Select to show the Reference materials field in the translation order form to let users upload reference files to their project, or clear to hide it. | Optional | Checkbox | Valid values:
|
Comments | Select to show the Add comments field in the translation order form to let users add a comment about their project, or clear to hide it. | Optional | Checkbox | Valid values:
|
Configuring access to XTM Portal Projects' All button
Go to the Pages tab in your domain and select XTM Projects.
In the Content tab on the toolbar go to Additional settings and:
select the check box next to the Show All customer's projects button to see all customer's projects created in Portal parameter to enable XTM Portal users to have access to the XTM Portal Projects' All button
clear the check box next to the Show All customer's projects button to see all customer's projects created in Portal parameter to disable XTM Portal users from having access to the XTM Portal Projects' All button,
Click Save and then click Publish.
The project creator can now have access to the XTM Portal Projects' All button as configured by the Administrator.
Languages
The default interface language is English (US).
The full list of the interface languages supported by XTM includes:
English (UK)
English (US)
Japanese
Polish
Turkish
German (Germany)
To add one of the available interface languages to your interface:
Tip
Contact XTM Support:
support@xtm.cloud
The green language switcher on the left hand side menu shows the languages available to you in XTM Portal. After selecting one of the languages, on the right hand side, under Pages you will see which of your company pages have been translated to this language.
Go to the Pages tab.
Select a page that you would like to translate.
From the top menu select Content > Localization.
As a result: The Locales table will appear presenting the following columns:
Title - the name of the language
Locale - the language code
Status - valid vales are:
Not localized
Draft
Published
Source - valid vales are:
No source
language and locale of the source page
Live - valid vales are:
Yes
No
From the Locales table select:
the language version that has already been published or has been saved as draft, click Copy to and select the language that you want to translate the selected page into
the language version that has not yet been localized, click Copy from and select the language that you want to translate your website from
Select Save and Publish.
Note
Every translated page in Silverstripe will retain its original URL and the language code will be appended based on the locale.
Payments tab (optional)
The default payment gateways available in XTM Portal is SagePay.
PayPal and Mollie can also be connected. XTM requires the user ID so that a connection can be established.
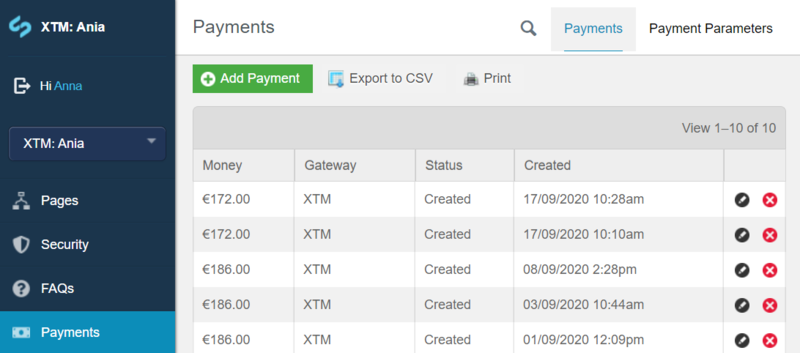
Payments tab
XTM International can prepare other payment gateways for you. Each payment gateway can be configured per client. For more information contact
Tip
Contact XTM Support:
support@xtm.cloud
Payment parameters
The Payment parameters tab is where you can find all the information about the gateway you have set up, such as payment gateway name, parameter name from the gateway configuration, and a unique, gateway configuration parameter value.
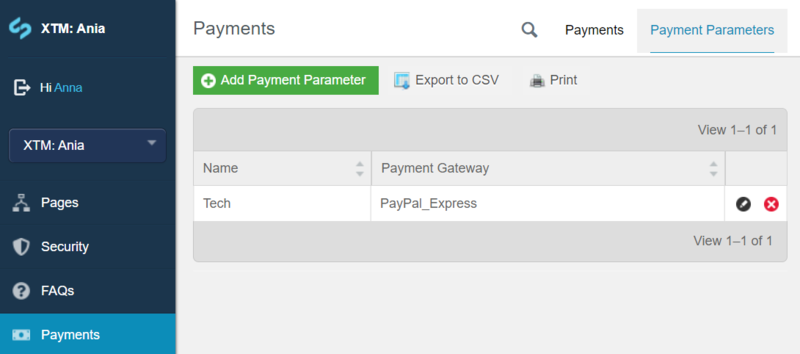
Payment parameters tab
XTM Portal users
The Portal users tab enables you to set up and manage users as well as control access to various pages or sections. It is possible to import user data in the form of a CSV file. Learn more about the CSV format requirements under the Show advanced usage link or go to Customer Groups in Portal.
Portal users can:
request translation and determine due dates for projects
see information about overdue or due projects
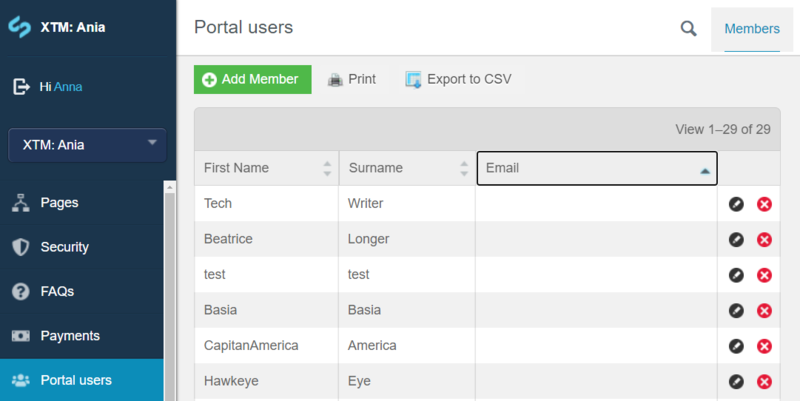
Portal users tab
Users
You can edit the details of existing users by clicking on the item you want to edit from the list or on the pencil button. To delete a user, click the Delete red button. Deleting any user will not affect the projects created in XTM.
In the New Member section (Add Member), you can create new users as well as edit and delete existing ones. The most important details of any user are:
email
password
XTM Customer ID
An email address can only be used once in the system (it will automatically become your username for XTM Portal logging).
Note
If any XTM Portal user is deleted in XTM, they are not automatically removed from XTM Portal.
Creating a customer group
In your XTM Portal UI go to Portal users tab and click the XTM Customer Groups option in the top-right menu.
Click the Add Customer Group button to create a new customer group and define the following parameters:
Name
Description
Customers
Click:
Save to save your Customer Groups configuration
Save and close to save your Customer Groups configuration and close the configuration window
Note
When updating a customer group here, that updated customer group will be the default one for all users.
Setting the default Customer Group
In your XTM Portal UI go to Settings and select XTM.
In the Customers tab, select the Multiple customers option and specify the customers for a customer group you want to be the default one.
Defining access to customer groups for Portal users
In your XTM Portal UI go to Portal users tab, click the Member option in the top-right menu.
Select a user and click the Customers tab.
Define customers and/or customer groups for the selected user as needed by selecting:
XTM Customers
Customer groups
As a result, a user group can have access to a combination of the following:
a single customer
numerous customers
a single customer group
numerous customer groups
Projects view
XTM Portal Administrators have access to the same information about the projects set up in XTM Portal as the information visible on the standard listing page plus additional data about the Requester who created the project
Project ID in Portal
Project name
Status
Source and Target languages
Project ID in XTM
Member’s first name
Member’s last name
Member’s email
The search option (under the  icon) lets XTM Portal Administrators sort projects by all attributes available on the list.
Project cost generation can be modified if opened in the edit mode.
Note
Projects canceled during requesting translation on Standard Request Translation page are not displayed on the Projects view page.
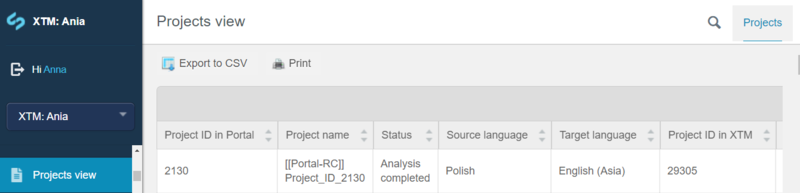
Projects view tab
SSO attributes
Tip
SSO: Single Sign-On is an authentication method. It uses a single ID and password to access autonomous applications.
Note
This tab is available to customers who have their SSO option enabled.
New Portal users can be created in XTM Portal rather than in XTM Cloud.
In SSO attributes you can:
define the mapping for a single user
define mapping SSO user's group
update SSO user details if they haven't been mapped
Alternatively, if you want to create a Customer PM in XTM, select the corresponding box and provide the Default XTM Customer ID for SSO. In this way, new Customer PMs will be set up in XTM and they will be automatically linked to that Customer.
All the projects requested by them will be assigned to this Customer. Any modifications made under Settings > XTM > SSO will apply to all available language versions of your website as they are set globally, not per page.
Enabling SSO
To turn on SSO in XTM Portal, the option needs to be configured in XTM Cloud first. For more information:
Tip
Contact XTM Support:
support@xtm.cloud
Once Single Sign-On has been activated in XTM Cloud, you need to activate it in the XTM Portal as well.
Go to the
 Settings tab and click the XTM tab in the top-right menu.
Select the SSO tab.
Select the Enable Single Sign On checkbox.
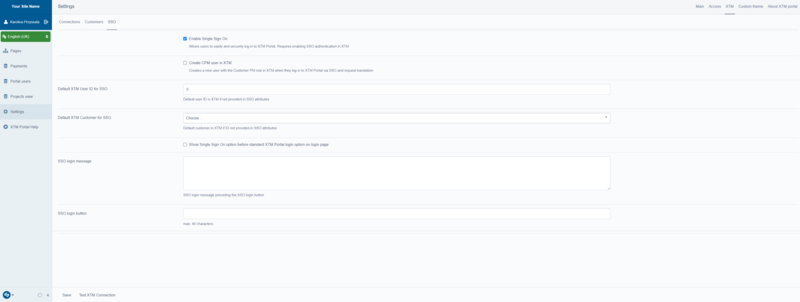
Enabling SSO Settings > SSO
Showing the SSO option before the standard XTM Portal login option on the user login page
Go to the
Settings tab and click the XTM tab in the top-right menu.Select the SSO tab.
Select the Show Single Sign On option before standard XTM Portal login option on login page checkbox.
Customizing SSO login message
Go to the
Settings tab and click the XTM tab in the top-right menu.Select the SSO tab.
Fill in the SSO login message field.
Customizing SSO login button
Go to the
Settings tab and click the XTM tab in the top-right menu.Select the SSO tab.
Fill in the SSO login button field.
Note
The maximum length of the SSO login button is 40 characters.
SSO attributes Member mappings
Here you can map a single user. SSO must be configured in an XTM instance first. Once SSO has been configured, you can map the user in the XTM Portal.
In the SSO attributes > SSO Attribute Member Mappings tab, click the green Add SSO attribute Member mapping button.
Fill in the required fields. You can check the required data with your SSO provider.
Client: XTM API client name as it appears in Settings > Connections.
Member Column: Select from the dropdown the field which appears during login.
SSO attribute name: defined in your SSO provider.
Select Use this field for authentication via SSO. Make sure to add at least one unique field in the authentication.
Select Save and close.
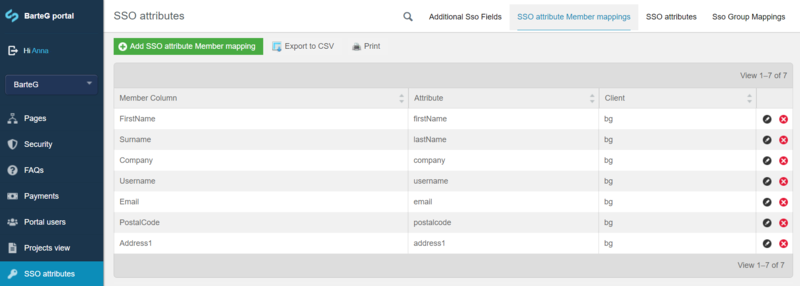
SSO attributes Member mappings
Additional SSO Attributes
Go to SSO attributes and in the Additional SSO Attributes tab click Add Additional SSO Attributes button.
In the new window, specify the following parameters:
Additional SSO Filed name - the name that appears on the member's profile page in the Additional SSO Attributes section. Any name is allowed.
Attribute – the name of attribute (e.g.: id) coming from SSO, for which you can also determine, if to:
Optionally Show this field on a Member profile page
Create to save your additional SSO fields mapping
Create and Close to save your additional SSO fields mapping and close the configuration window
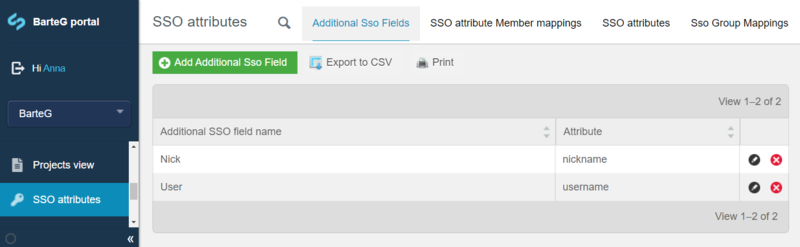
SSO attributes Additional SSO Fields
SSO attributes tab
You can check the types of attributes coming in from SSO.
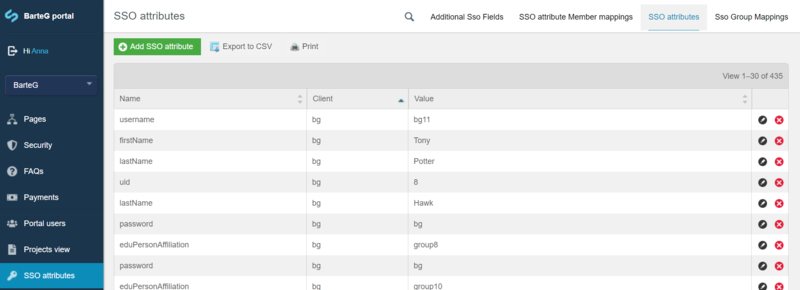
SSO attributes tab in the SSO attributes menu
Updating SSO users
In the SSO Group Mapping, select the green Add SSO Group Mapping button
 .
.Fill in Name and Value. You can check the required data in the SSO attributes tab.
Select the required group from the dropdown.
Select Save or Save and Close.

SSO attributes Group mappings
SSO Customer Group Mappings
As an Administrator, when you enable and define customer groups within the Manage customers option, you will be able to map SSO users to customer groups from the SSO Customer Group Mappings tab within the SSO attributes page.
Go to SSO attributes and select the SSO Customer Groups Mapping tab.
Click the Add SSO Customer Group Mapping button and define the following attributes:
Name – the name of the SSO attribute
Value – the value of the SSO attribute, such as:
a user department
ID
or any custom value of your choice
Customer groups – a drop-down from which you can select and assign only one customer group for SSO users
Click:
Save to save your SSO Customer Group Mapping
Save and close to save your SSO Customer Groups Mapping and close the configuration window
When a user logs in to XTM Portal, they will have customer groups assigned as configured by the Administrator.
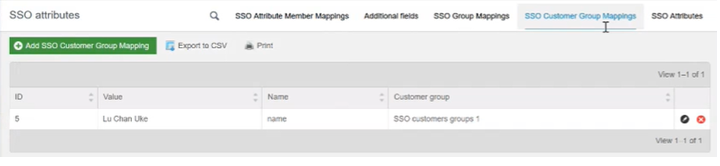
SSO Attributes: SSO Customer Group Mappings
Settings tab
Under the Settings tab, you can manage global settings, like the site name and user access control.
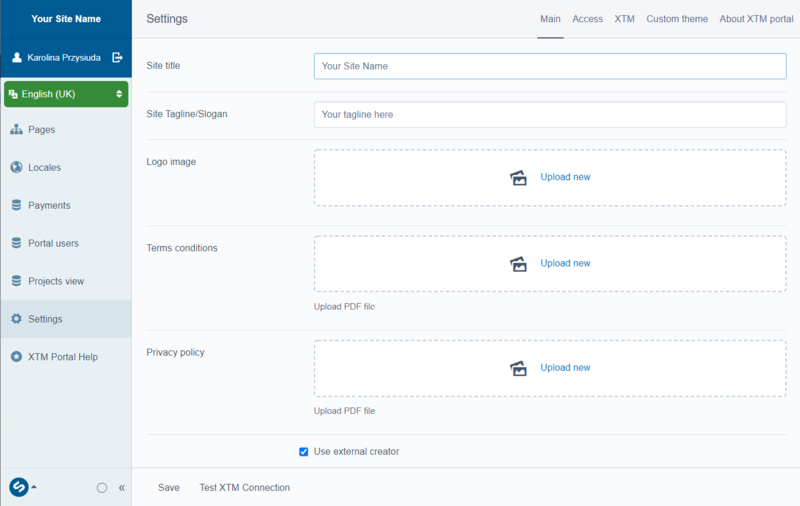
Settings tab – CMS view
Tabs in the top-right menu allow you to:
determine the access to pages: anyone, logged-in users, specific group (Access)
check or set your connection to XTM instance (XTM)
add Custom theme
find information about the release date of the current version of XTM Portal and its compatibility with XTM (About XTM Portal)
Enabling email notification to Requester when all tasks will be accepted in the Project
Go to the
Settings tab and click the Main tab on the top-right menu.Enable the Email to Requester when all tasks will be accepted in the Project checkbox.
As a result, XTM Portal Requester will receive an email confirmation with the information about the project due date once all tasks in the project are accepted in the Enforce task or project acceptance procedure.
Connecting XTM to XTM Portal
You can test your connection to XTM in the Settings tab.
In case of connection issues, a message appears prompting you to verify your XTM settings.

Connection to XTM error message
XTM Portal is connected to your instance of XTM using the following credentials:
XTM API URL
XTM API Client name (must have PM role assigned in XTM)
XTM API User ID
XTM API Password
XTM Portal Customer ID
Project name prefix - use the prefix to indicate the XTM Cloud Project Manager that the project has been created in XTM Portal
Check against previous passwords - use this option to define from how many previous passwords must the new user password differ
If these credentials are updated in XTM, they will also need to be updated in the XTM Portal.
Configure XTM Settings:
Go to the Settings tab and click the XTM tab in the top-right menu.
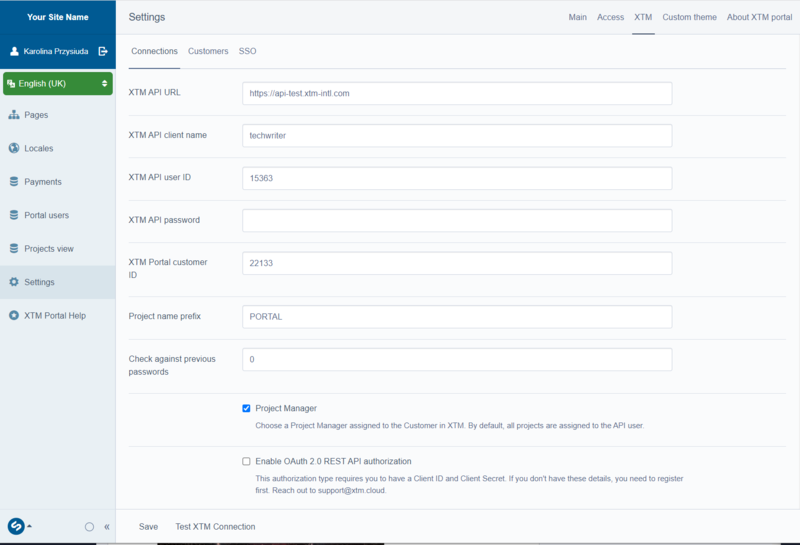
Settings tab – XTM configuration
Choosing Project Manager assigned to the Customer in XTM
Administrators can choose a Project Manager assigned to the Customer in XTM. By default, all projects are assigned to the API user.
Go to the
Settings tab and click the XTM tab in the top-right menu.From the top-left menu, select the Connections tab.
Select the Project Manager checkbox.
Click Save.
Choose a Project Manager assigned to the Customer in XTM.
Enabling OAuth 2.0 REST API authorization
Go to the
Settings tab and click the XTM tab in the top-right menu.Select the Connections tab.
Select the Enable OAuth 2.0 REST API authorization checkbox.
As a result, two additional text fields will appear:
Client ID
Client Secret
In order to obtain values for these two fields:
Tip
Contact XTM Support:
support@xtm.cloud
Managing customers
By default, XTM Portal Requesters will see only one customer, defined under the XTM > Connections tab.
Default customer
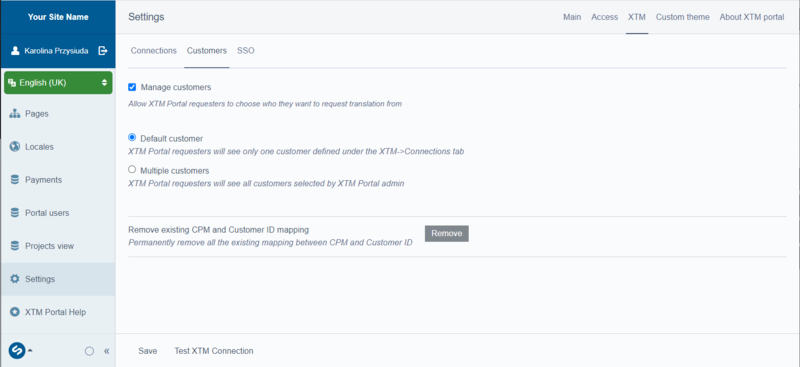
Default customer in XTM > customers tab
You can permanently remove existing Customer PM ID mapping. Click Remove under the Default customer checkbox.
As an Administrator, you can change the customer settings for the XTM Portal Requesters. Choose Multiple customers option so that XTM Portal Requesters will see all selected customers.
Removing multiple customers
Go to the
Settings tab and click the XTM tab in the top-right menu.From the top-left menu, select the Customers tab.
Select the Manage customers checkbox.
All available customers are listed under Multiple customers option. Remove redundant customer by clicking the cross next to it.
Click Save.
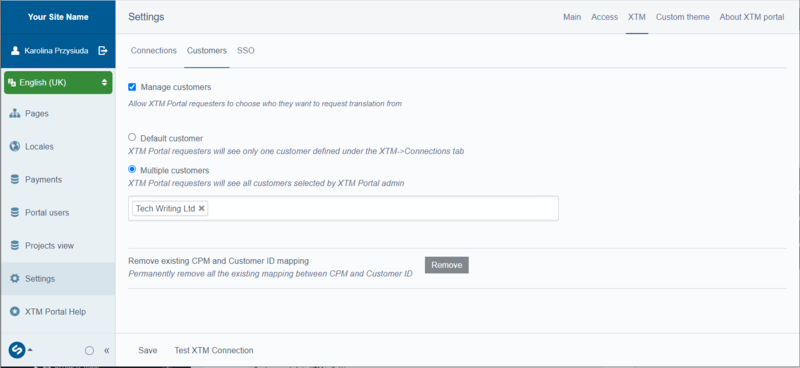
Customers tab in XTM > Settings
Adding Custom themes
Themes are sets of templates and front-end assets used to configure your instance of XTM Portal. You can use the CSS editor in Silverstripe to customize the XTM Portal appearance.
Access to the editor is granted by the XTM Support Team (support@xtm.cloud).
The Custom themes feature is launched on test servers, where clients can introduce their own modifications to their XTM Portal instance. With each release, XTM will copy the configuration to the client’s production server.
Any modifications made in the CSS editor will apply to all available language versions of your website.
Go to the
Settings tab and open the Custom Theme tab in the top-right menu.You can change CSS code directly in the Custom CSS editor.
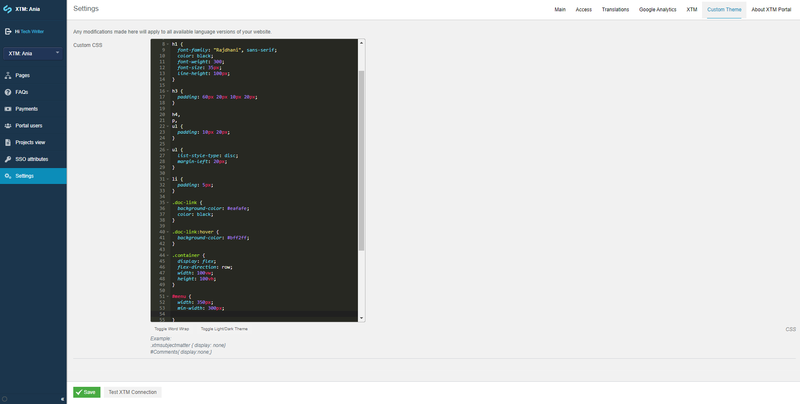
CSS editor for the customization of themes
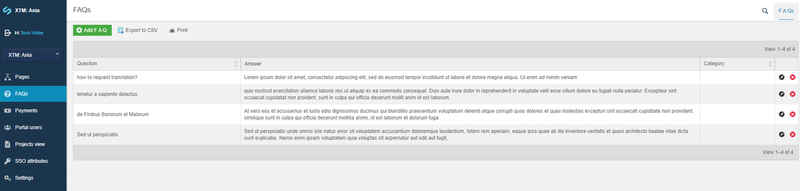
FAQs tab (optional)
This functionality is used to manage Frequently Asked Questions and answers. Create a link FAQ page first, then add new FAQ records.
The functionality comes with a search index and can be optimized with keywords.
Go to the Pages tab. Choose Add new.
Choose the page level.
Choose page type, scroll down to XTM FAQ Page.
Choose Create.
Choose Save and publish.
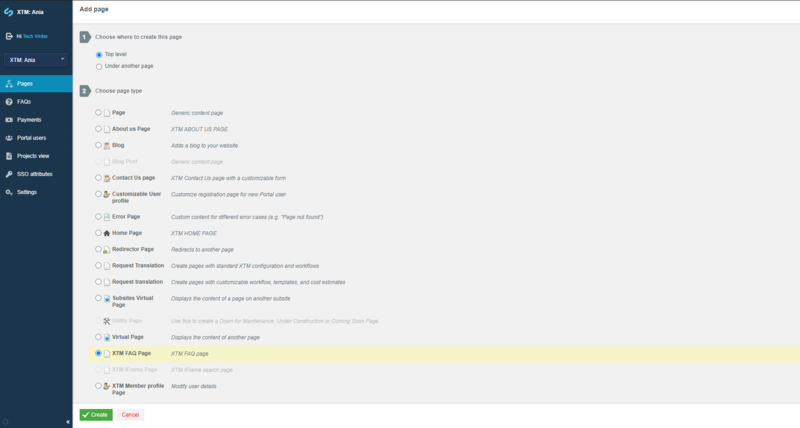
Adding FAQ page
Choose the FAQs tab
 from the sidebar. Choose Add FAQ.
Fill in the record as required. Add keywords and category. Click Save and close.
Go to Pages > FAQ Page > Featured FAQs.
Type the name of your existing record in the Find FAQs search box.
Choose Link Existing.
Adding FAQ record

Frequently Asked Questions - editor