Configuration: for administrators only
XTM Connect - Figma administrator panel
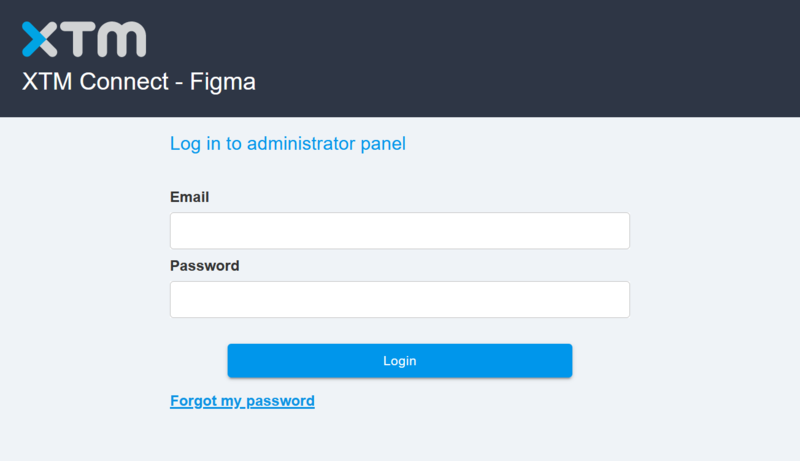
XTM Connect - Figma administrator panel: logging in
XTM Connect - Figma administrator panel overview
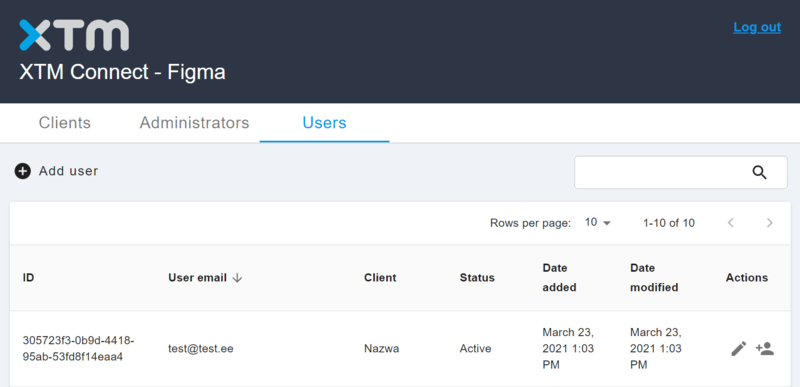
XTM Connect - Figma administrator panel view
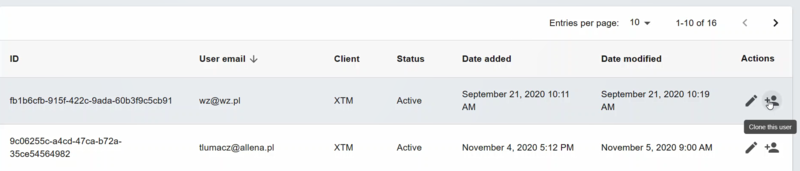
Administrator panel contents
The panel consists of:
user ID
user email address
client for which a given user has been created
user status
date on which the user was added or modified
clone user icon
 . For more information check Cloning users
edit user icon
 . For more information check Editing users
Sorting users in the administrator panel
All users can be easily sorted by:
email
status
date added and modified
custom search
To sort in the ascending order: Click on the arrow
 next to the chosen tab.

Sorting in the ascending order
To sort in the descending order: double-click on the arrow
 next to the chosen tab.

Sorting in the descending order
Adding users of XTM Connect in the administrator panel
Note
Client name (your company name) is set automatically by XTM and cannot be modified.
Log in to the XTM Connect administrator panel.
Click Add User.
Fill in the details of a new user:
Email.
Password.
First name.
Last name.
Select the required Client from the dropdown. The clients' list is set by the XTM admins.
Select the required interface language from the dropdown.
Select the Active box – inactive users cannot use the connector.
Generate and upload screenshots from Figma:
Select: users with this option enabled can choose to send a screenshot of the source page to XTM Workbench so that the linguists can see the text in context.
Deselect: this option won't be available in the UI.
Select Ways of import translated content checkbox:
Import jobs separately: enables the option to import translations from XTM individually at the job level in the connector by clicking the Import button in the Translation queue.
Import all jobs: adds the Import all button to the Translation queue.
Periodically import jobs every [...] minutes: enables the automatic import of XTM jobs which will be placed in the Figma Pages panel.
Click the down arrow
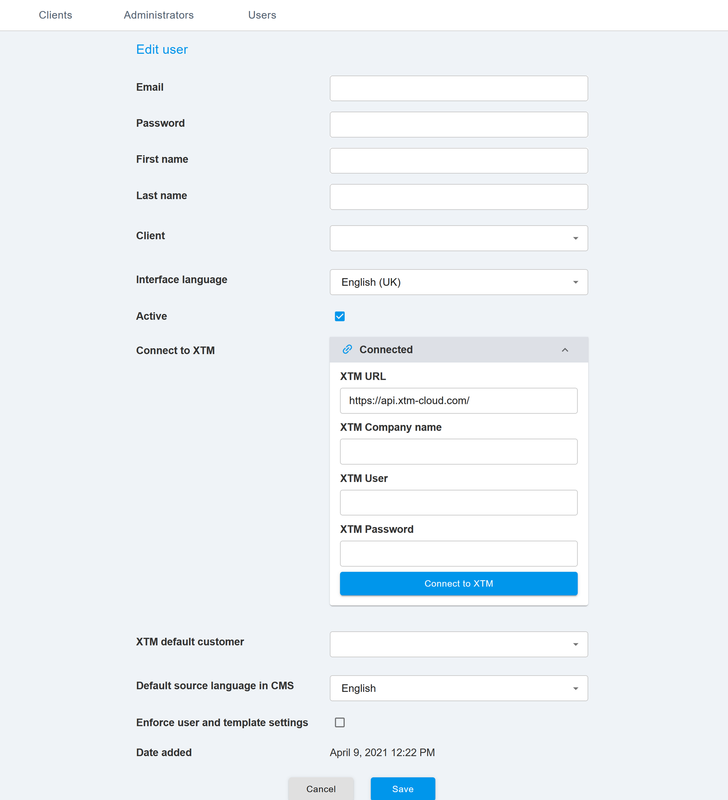
 next to Connect to XTM and fill in the required fields with information about the XTM account:
XTM URL: (the URL of your XTM instance) clients using xtm.cloud server can connect to: https://api.xtm-cloud.com/. Clients using private servers can connect to the URL of their XTM instance.
XTM Company name.
XTM User.
XTM Password.
Click Connect to XTM. Once the connection has been established, the Connected status appears in the dropdown.
Fill in all the required details:
XTM default customer.
XTM default template.
XTM project name prefix: Set a prefix that will be added to all your XTM projects created in the connector.
Default source language in CMS: this language is taken from XTM Cloud and is auto-populated in the connector. You can choose another language imported from XTM Cloud from the dropdown.
Enforce user and template settings: users will only be able to use the settings defined by the admin.
Click Save.
Once you created a user account, you need to share the user details with the user. The user can also use the Forgot Password option when logging in for the first time.
Tip
To use Generate and upload screenshots from the Figma option, your XTM account has to be configured by the XTM Support team.
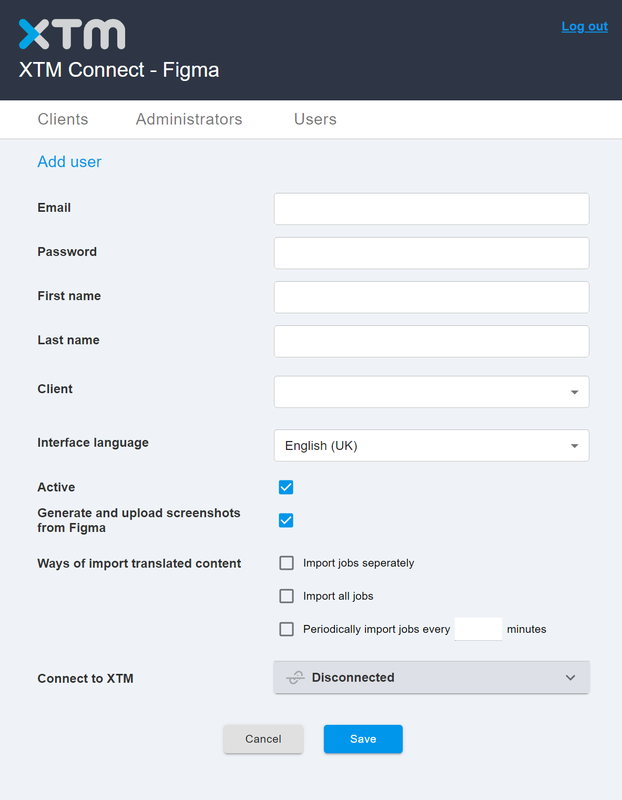
Adding user details
Adding user details
Cloning users
Cloning users is a convenient feature that lets you copy the XTM configuration data and create a new user without the need to refill the form with all the required details.
Click the user icon
. Clone this user.Fill in the new details:
Email.
Password.
The remaining details are copied from the cloned user.
Once you created a user account, you need to share the user details with the user. The user can also use the Forgot Password option when logging in for the first time.
Cloning user
Editing user details
Click the pen icon
next to the user you wish to edit.Edit data as required.
Click Save.
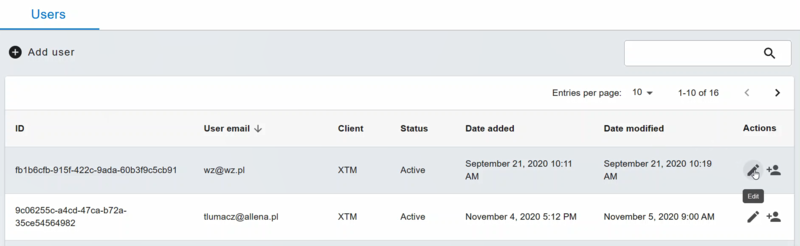
Editing user